
Did you know that approximately 1 in 5 car breakdowns are caused by a dead battery? It’s a common issue that many drivers face, but knowing how to jump start a car can save you time, money, and hassle.
Whether you’re stranded in a parking lot or on the side of the road, this step-by-step guide will equip you with the knowledge and confidence to jump start your car safely and get back on the road quickly. From understanding the basics of car batteries to connecting the jumper cables properly, we’ll walk you through each essential step.
By following this guide, you’ll learn how to jump start a car like a pro, with clear instructions and helpful tips along the way. So let’s dive in and discover how you can become your own roadside hero!
Understanding the Basics of Car Batteries
Car batteries play a crucial role in providing the electrical power needed to start your engine and run the vehicle’s various systems. Having a good understanding of car batteries is essential for proper maintenance and troubleshooting. Let’s delve into the basics of car batteries and explore what causes them to die and the signs that indicate your battery may need a jump-start.
What Causes a Dead Battery?
A dead battery can occur due to various reasons. One common cause is leaving your lights on for an extended period without the engine running. This can drain the battery’s charge significantly, making it unable to start your car. Another factor that can lead to a dead battery is a faulty charging system. If the alternator is not properly charging the battery, it will eventually lose its charge and render your car immobile. Extreme weather conditions, such as extremely low temperatures, can also affect the battery’s performance and lifespan.
Signs Your Battery Needs a Jump
Recognizing the signs that indicate your battery may need a jump-start is essential for timely intervention. Dim headlights are a common sign of a weak battery as they require a sufficient power supply to function properly. If you notice that your headlights appear dimmer than usual, it’s likely that your battery is running low. Another sign is a slow cranking engine when you try to start your car. If you hear a sluggish sound when turning the key in the ignition, it’s a strong indicator that your battery is struggling to supply the necessary power.
To summarize, understanding the basics of car batteries enables you to better maintain and troubleshoot any issues related to battery performance. Knowing what causes a dead battery and being able to identify the signs of a battery in need of a jump-start will help you take the necessary steps to ensure your car remains operational.
Essential Tools You Need to Jump-Start a Car
To successfully jump-start a car, you’ll need a few essential tools. These tools will help you effectively revive a dead battery and get your vehicle back on the road. The three main tools you’ll need are:
Jumper Cables
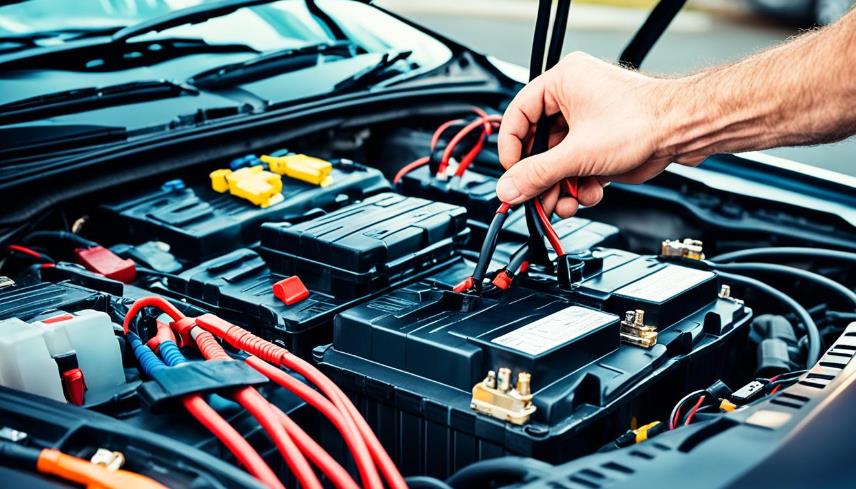
Jumper cables are the lifeline of jump-starting a car. They are used to connect the dead battery to a live battery, allowing the flow of charge and powering up the dead car. When choosing jumper cables, opt for ones with durable clamps and sufficient length to ensure flexibility during the jump-start process. Here’s a visual representation of how jumper cables are connected:
Magnetic Flashlight
A magnetic flashlight is a handy tool when jump-starting a car, especially in low-light conditions. It comes equipped with a powerful magnet that securely attaches to the hood or any metal surface, providing a hands-free lighting solution. Having a magnetic flashlight ensures that you can clearly see the battery terminals and other necessary components during the jump-start process.
Pocket Screwdriver
A pocket screwdriver can be incredibly useful when jump-starting a car. It is especially handy for removing terminal covers and ensuring a secure connection between the jumper cables and the battery terminals. The compact size of a pocket screwdriver makes it easy to carry and store, making it a must-have tool for any jump-starting situation.
With these essential tools in your car emergency kit, you’ll be well-prepared to handle a dead battery and jump-start your vehicle when needed. Now that you know the tools required, let’s move on to the safety precautions you should take before attempting to jump-start a car.
| Tool | Description |
|---|---|
| Jumper Cables | Used to connect the dead battery to a live battery for charging. |
| Magnetic Flashlight | Provides hands-free lighting in low-light conditions. |
| Pocket Screwdriver | Useful for removing terminal covers and ensuring a secure connection. |
Safety Precautions Before Jump-Starting

Inspect for Leaks and Damage
Prior to jump-starting a car, it is of utmost importance to conduct a thorough inspection of the battery to ensure there are no leaks or visible damage. Inspecting the battery is an essential step to avoid any potential hazards that may arise from a damaged or faulty battery. Leaks or damage on the battery can lead to dangerous situations, and it’s crucial to address any issues before proceeding with the jump-start process.
Wear Protective Gear
Another crucial safety measure to take before jump-starting a car is to wear protective gear. This includes wearing gloves and safety glasses to safeguard yourself from possible acid contact or electrical shock. Protective gear acts as a barrier between you and any potential hazards during the jump-starting process, significantly reducing the risk of injuries or accidents.
Protective gear provides an added layer of safety and should be worn every time you engage in jump-starting a vehicle. It not only protects your hands and eyes from potential harm but also ensures you can handle the jump-start process confidently.
Remember, safety should always be your top priority when jump-starting a car. By inspecting for leaks and damage and wearing the appropriate protective gear, you can minimize the risks involved and carry out the jump-starting process safely and efficiently.
How to Park the Vehicles Correctly?
Properly parking the vehicles involved in the jump-start process is necessary for safety and accessibility. Clear instructions will ensure that both vehicles are close enough for the jumper cables to reach but not touching, minimizing the risk of any accidents.
When parking the vehicles for a jump-start, you have two options: parking them nose to nose or side by side. Each option has its advantages and considerations.
If you choose to park the vehicles nose to nose, make sure they are facing each other with a few feet of space between the front bumpers. This positioning allows for easy access to the engine compartments of both cars.
On the other hand, if you prefer to park the vehicles side by side, align them parallel to each other, leaving a small gap between the two cars. This arrangement can provide better visibility and easier cable access, especially if the battery terminals are located on the side of the engine bay.
Remember to engage the parking brakes on both vehicles and turn off the ignition before starting the jump-start process. This safety measure will prevent any accidental vehicle movement during the procedure.
Before commencing the jump-start, visually inspect the parking area for any potential hazards, such as puddles, loose cables, or flammable materials, ensuring a safe environment for both vehicles.
By following these parking instructions, you can position the vehicles correctly, enabling a smooth and safe jump-start process.
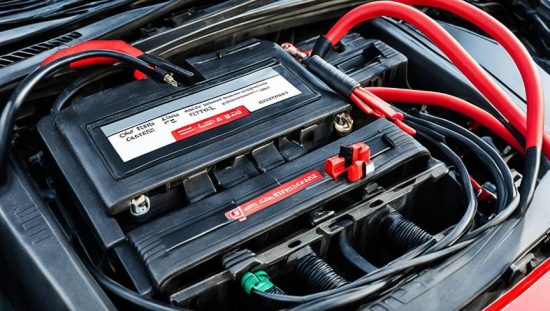
Locate the Battery Terminals
Before connecting the jumper cables, it is important to locate the battery terminals on both the dead and live batteries. Identifying these terminals correctly is crucial for a successful jump-start. The positive and negative terminals are usually marked with “+” and “-” symbols.
Identifying Positive and Negative Terminals
When locating the battery terminals, look for the positive and negative signs. The positive terminal is typically red and marked with a “+” symbol. The negative terminal is usually black and marked with a “-” symbol. It’s important to correctly identify these terminals to avoid any connectivity issues or damage to the electrical components of the vehicles.
Consulting the Owner’s Manual
If you are unsure about the location or identification of the battery terminals, referring to the owner’s manual of your vehicle can provide valuable guidance. The owner’s manual will provide detailed information on the exact location of the battery and the terminals. It will also provide instructions on how to safely jump-start your specific vehicle model.
| Battery Terminal | Identification |
|---|---|
| Positive Terminal | Red color with a “+” symbol |
| Negative Terminal | Black color with a “-” symbol |
How to Jump Start a Car: A Step-by-Step Guide

In this section, we will provide you with a detailed step-by-step guide on how to jump-start a car with a dead battery. Following these instructions will help you safely and effectively start your car and get back on the road.
To begin, make sure you have all the necessary tools and equipment ready, including a set of jumper cables and a vehicle with a good battery to jump-start your car. If you need a refresher on the essential tools needed for jump-starting a car, refer back to Section 2.
Once you have everything prepared, follow the steps below:
- Park the vehicles correctly: Ensure that both vehicles are in park or neutral with the parking brakes engaged. Place them close enough for the jumper cables to reach each battery, but make sure the cars are not touching. Refer to Section above for detailed instructions on proper parking.
- Identify the battery terminals: Open the hood of both vehicles and locate the positive and negative terminals of each battery. If you need assistance in finding the terminals, refer to the instructions in Section above.
- Attach the jumper cables: Take the red jumper cable and attach one end to the positive terminal of the dead battery. Then, connect the other end of the red cable to the positive terminal of the live battery. Next, take the black jumper cable and attach one end to the negative terminal of the live battery. Finally, connect the other end of the black cable to a metal, unpainted part of the dead vehicle’s engine block.
- Start the engine and charge the battery: Start the engine of the vehicle with the live battery and let it run for a few minutes. This will allow the dead battery to receive a charge. After some time, attempt to start the engine of the vehicle with the dead battery. If it starts successfully, let both engines run for a few more minutes to ensure the dead battery is fully charged.
- Disconnect the jumper cables: In the reverse order of attachment, remove the black cable from the engine block of the previously dead car. Then, remove the black cable from the negative terminal of the live battery. Finally, remove the red cable from the positive terminals of both batteries.
Now, your car should be up and running! Remember to drive the vehicle for at least 15-20 minutes to allow the alternator to fully charge the battery before turning off the engine.
Connecting the Jumper Cables Properly
Connecting the jumper cables correctly is crucial to avoid any damage to the vehicles’ electrical systems. Follow these step-by-step instructions to ensure a safe and effective connection:
Attaching to the Positive Terminals First
1. Identify the positive terminal on the dead battery and the live battery. The positive terminal is typically marked with a “+” symbol.
2. Take one end of the jumper cables and attach the positive clamp (usually red) to the positive terminal of the dead battery.
3. Attach the other end of the same jumper cable to the positive terminal of the live battery.
Make sure the clamps are secure and properly connected to the terminals.
Grounding the Negative Clamp
1. Locate an unpainted metal surface on the engine block of the live car. This can be a bolt or bracket.
2. Attach the negative clamp (usually black) of the jumper cable to the grounding point on the live car’s engine block.
Ensure a solid connection with the metal surface.
By following these steps, you have now connected the jumper cables properly, starting with the positive terminals and grounding the negative clamp. This ensures a safe and efficient jump-start process.
Starting the Engine and Charging the Battery
Once you have successfully connected the jumper cables, it’s time to start the engine and begin charging the dead battery. Follow these steps to ensure a smooth process:
Starting the Helper Car
The first step is to start the helper car, which has the fully charged battery. Start the helper car’s engine and let it run for a few minutes. This will allow the battery to transfer its charge to the dead battery.
Attempting to Start the Dead Car
After the helper car has been running for a few minutes, attempt to start the dead car. Turn the ignition key and listen for any signs of the engine starting. If the engine starts, congratulations! The battery has been successfully jump-started. However, if the engine doesn’t start right away, don’t panic. Try the following troubleshooting steps:
- Check the connection of the jumper cables to ensure they are securely attached.
- Allow the helper car to run for a few more minutes to provide additional charge to the dead battery.
- If the dead car still doesn’t start, double-check the battery terminals for corrosion or debris. Clean them if necessary and try again.
- If none of these steps work, it may indicate a deeper issue with the dead car’s battery or electrical system. In this case, it’s recommended to seek professional assistance.
Remember to keep an eye on both vehicles’ engine temperatures and be cautious when working around the engine compartments. Once the dead car is successfully running, you can disconnect the jumper cables and continue driving as normal.
Jump-starting a car can be a straightforward process with the right knowledge and precautions. By following these steps, you’ll be able to start your engine and charge the battery effectively, getting you back on the road in no time.
Disconnecting the Jumper Cables Safely
Now that the dead car is up and running again, it’s time to disconnect the jumper cables safely. This step is crucial to ensure that no damage or accidents occur during the cable removal process. By following these instructions, you can disconnect the cables in the reverse order they were connected, preventing any sparks or electrical issues.
To start, carefully remove the negative clamp from the previously dead car’s battery. Be sure to avoid contact with any metal surfaces to prevent accidental grounding. Once the negative clamp is safely detached, move on to the positive clamp and remove it from the live battery in the helper car.
With both clamps successfully removed, take care to avoid allowing the clamps to touch each other or any metal surfaces. This will prevent any sparks that could potentially damage the vehicles’ electrical systems. Once the cables are safely disconnected, you can stow them away properly to ensure they don’t become tangled or damaged for future use.
Remember, safety is paramount, so always exercise caution when handling the jumper cables and follow these steps to disconnect them safely. By doing so, you can successfully complete the jump-starting process without any issues and get back on the road quickly and safely.
FAQs on How to Jump Start a Car
How to jump start a car using jumper cables?
To jump-start a car, attach the red clamp into positive terminal of the dead battery and attach the other red clamp to the positive terminal of the working battery, followed by the black clamp to the negative terminal of the working battery, and finally the other black clamp to an unpainted metal surface on the car with the dead battery.
How to jump start a car without another car?
If you don’t have another car to jump start yours, you can use a portable jump starter, a self-contained battery pack that can provide the necessary power to start your car.
How to safely jump start a car to avoid damage?
To avoid damaging your vehicle’s electrical system, ensure the jumper cables are connected correctly and the donor car is not running while connecting the wires.
How to jump start a car in cold weather?
In cold weather, allow the donor car to run for a few minutes before attempting to start the dead car, and keep both cars running for a while after jump starting to ensure the battery is fully charged.
How to jump start a car if the battery is located in the trunk?
If the battery is in the trunk, use the jump start terminals under the hood, typically near the engine, to safely jump start the car.