Starting a YouTube channel can be a thrilling adventure, giving you the opportunity to unleash your creativity, share your expertise, and potentially reach a vast audience. But where do you begin? How do you navigate the overwhelming process of starting your own YouTube channel?
In this beginner’s guide, we will provide you with step-by-step instructions, valuable tips, and insightful guidance to help you kickstart your YouTube journey with confidence. Whether you’re an aspiring vlogger, a passionate storyteller, or an expert in a specific field, this guide will equip you with the knowledge and tools you need to make an impactful entrance into the world of YouTube.
So, are you ready to dive in and discover how to start a YouTube channel? Let’s get started!
Understanding the Basics of a YouTube Channel
Before diving into the details of setting up your YouTube channel, it’s important to understand why having a channel is essential for a public presence on YouTube.
Why You Need a Channel for Public Presence on YouTube
A YouTube channel allows you to upload videos, comment on other videos, make playlists, and engage with the YouTube community. It gives you a platform to express yourself, share your content, and connect with viewers from around the world. Whether you’re an aspiring creator, a business, or an individual looking to share your passion, a YouTube channel is the starting point for building your online presence and reaching a wide audience.
Creating Your Channel on YouTube’s Website or Mobile Site
Creating a YouTube channel is a straightforward process that can be done either on the YouTube website or the mobile site. Simply follow these steps:
- Go to the YouTube website or open the YouTube mobile app.
- Sign in to your Google account or create a new one.
- Click on your profile picture or the icon representing your account.
- Select “Create a channel” or “Your channel” from the dropdown menu.
- Follow the on-screen prompts to set up your channel name, customize your channel art and profile picture, and provide additional information about your channel.
- Once you’ve completed these steps, your YouTube channel will be created and you can start uploading videos and interacting with the YouTube community.
Creating a YouTube channel is the first step towards establishing your online presence and sharing your content with the world. Whether you’re an individual looking to showcase your talents, a business looking to promote your products or services, or a creator seeking to connect with like-minded individuals, a YouTube channel provides the platform and tools you need to succeed. So, go ahead and create your channel today and start making your mark on the YouTube community!
Setting Up Your Personal YouTube Channel

Now that you have a clear understanding of the basics of a YouTube channel and the process of creating one, it’s time to set up your own personal YouTube channel. This will be your very own corner of the internet where you can share your unique content, connect with your audience, and begin building your brand.
Setting up your personal YouTube channel is a straightforward process that can be done in just a few simple steps. First, make sure you have a Google account. If you don’t have one already, you can easily create a Google account by visiting the Google account creation page.
Once you have your Google account, sign in to YouTube using your credentials. Then, click on your profile picture in the top right corner of the screen and select “Create a channel” from the dropdown menu. You will be prompted to choose between using your personal name or a business or other name for your channel.
After selecting your channel name, you will have the option to customize your profile and channel settings. This includes adding channel art, which is the large banner displayed at the top of your channel page. Channel art is an important visual element that helps to establish the look and feel of your channel. It’s a great opportunity to showcase your personality or brand, so make sure to create an eye-catching banner that reflects the content and style of your channel.
Once you have customized your profile and channel settings, you’re all set to start uploading videos and engaging with your audience. Remember, your personal YouTube channel is your platform to express yourself, share your passions, and connect with viewers who resonate with your content. So take the time to create a channel that truly represents you and your brand.
Choosing Between Personal and Brand Accounts
When setting up your YouTube channel, one of the decisions you’ll need to make is whether to create a personal account or a brand account. Understanding the differences between these two types of accounts is crucial in determining which one is more suitable for your needs.
Benefits of a Brand Account for Multi-Manager Access
A brand account offers several benefits, especially if you plan to have multiple managers or contributors for your YouTube channel. With a brand account, you can grant access and permissions to others, allowing them to manage and contribute to your channel without sharing your personal login credentials. This feature is particularly useful for businesses, organizations, or collaborations where multiple individuals need to collaborate and have separate login credentials.
Whether you’re working with a team or have different people responsible for various aspects of your channel, a brand account provides a streamlined process for managing and delegating tasks. It offers enhanced security and flexibility while maintaining control over your YouTube channel’s operations.
Steps to Link Your Channel to a Brand Account
If you’ve decided that a brand account is more suitable for your needs, here are the steps to link your channel to a brand account:
- Create a Brand Account: First, create a brand account associated with your Google account. You can do this by signing in to YouTube, going to your channel settings, and selecting “Add or manage your Google Account.” Follow the prompts to create a brand account.
- Verify and Confirm: Once the brand account is created, you’ll need to verify and confirm it. This process may involve providing additional information or verifying your ownership or association with a particular brand or organization.
- Link Your Channel: After the brand account is verified, you can link your YouTube channel to it. Go to your channel settings, select “Advanced settings,” and choose the “Move channel to a brand account” option. Follow the instructions to complete the linking process.
- Transfer Ownership (Optional): If you want to transfer ownership of your channel to the brand account, you can do so by going to the “Users and Permissions” section of your channel settings. From there, you can add the brand account as an owner and remove yourself as the primary owner.
Linking your channel to a brand account provides you with the necessary tools and features to manage your YouTube presence more effectively. It enables collaboration, enhances security, and streamlines account management for multi-manager access.
Tapping into YouTube’s Vast Audience for Your Content
YouTube is home to a vast audience of active users who are constantly seeking new and engaging content. Whether you’re a budding creator or an established YouTuber, understanding how to tap into this audience and maximize the reach of your content is crucial for the success of your channel.
One of the key factors in reaching a wider YouTube audience is creating high-quality and compelling content that resonates with viewers. By producing videos that capture their attention and provide value, you’re more likely to attract new viewers and retain existing ones.
Additionally, leveraging strategies such as optimizing your titles, descriptions, and tags with relevant keywords can help improve your content’s discoverability on the platform. This means that when users search for topics related to content reach, your videos have a better chance of appearing in their search results.
Another effective way to increase your audience reach on YouTube is to actively engage with your viewers. Responding to comments, asking for feedback, and encouraging subscribers to share your videos with their friends can help organically grow your channel’s viewership.
Furthermore, collaborating with other YouTubers in your niche can expose your channel to their existing audience and vice versa, effectively expanding your reach and potentially gaining new subscribers.
Finally, promoting your YouTube channel and videos on other social media platforms, such as Facebook, Instagram, and Twitter, can help drive traffic to your channel and attract viewers who may not be active on YouTube regularly.
By implementing these strategies and maximizing the potential reach of your content, you can gradually build a loyal and engaged audience on YouTube, leading to increased views, subscriptions, and overall success for your channel.
How to Start a YouTube Channel: Step-by-Step Guide
Signing Up for a Google Account
Before you can start your YouTube channel, you’ll need to sign up for a Google account. This account will serve as your central hub for all Google services, including YouTube. If you already have a Google account, you can skip this step and proceed to the next one.
To create a Google account, follow these simple steps:
1. Go to the Google account creation page.
2. Fill in the required information, such as your name, email address, and desired password.
3. Complete the security verification process to protect your account.
Once you’ve successfully created your Google account, you’re one step closer to launching your YouTube channel.
Creating a YouTube Handle and Channel Name
Now that you have your Google account, it’s time to create your YouTube handle and channel name. Your YouTube handle will be your unique identifier on the platform, and your channel name will be the name viewers see when they visit your channel.
Here’s how you can create your YouTube handle and channel name:
1. Open YouTube and sign in with your Google account credentials.
2. Click on your profile picture or avatar in the top right corner of the screen.
3. Select “Settings” from the drop-down menu.
4. In the settings menu, click on “Create a channel” or “Use a business or other name.”
5. Follow the prompts to choose a name for your channel and confirm your selection.
6. Congratulations! You’ve successfully created your YouTube handle and channel name.
Remember, your channel name should be memorable and reflect the content you plan to share. It’s important to choose a name that is unique and representative of your brand or persona.
Designing Your YouTube Channel Banner
Your YouTube channel banner is an important visual element that represents your brand and grabs viewers’ attention. A well-designed and eye-catching banner can make a lasting impression on your audience and entice them to explore your content further.
When designing your YouTube channel banner, consider the following tips to create a professional and appealing look:
1. Channel Artwork
Choose channel artwork that reflects the theme, tone, and niche of your channel. It should align with your overall branding and convey the essence of your content. You can create custom graphics, use high-quality photos, or even showcase your own artwork.
2. Captivating Design Tips
Use a visually appealing layout with unique typography and complementary colors. Consider incorporating your logo and tagline into the banner to establish brand identity. Remember to keep the design clean and uncluttered to maintain a professional aesthetic.
3. Recommended Dimensions
YouTube recommends a banner size of 2560 x 1440 pixels to ensure optimal display across various devices. Keep in mind that parts of the banner may be cropped on certain devices, so place important elements within the safe zone of 1546 x 423 pixels.
4. Design Tools
To make the design process easier, you can use graphic design tools like Adobe Photoshop, Canva, or PicMonkey. These platforms provide pre-designed templates, customizable elements, and easy-to-use features to help you create a visually stunning YouTube channel banner.
Remember, your YouTube channel banner is the first impression viewers have of your channel, so take the time to create a visually appealing and captivating design. By following these design tips and leveraging the right tools, you can create a professional-looking banner that reflects your channel’s aesthetic and attracts viewers.
Creating an Effective Channel Trailer
A channel trailer is a powerful tool to attract and engage new viewers to your YouTube channel. It’s a short video that provides a glimpse into what your content is all about and establishes a connection with your audience. The purpose of a channel trailer is to ignite curiosity and encourage viewers to explore further.
The Purpose of a Channel Trailer
The main purpose of a channel trailer is to introduce new viewers to your channel and entice them to subscribe. It’s your chance to make a memorable first impression and showcase the value they can expect from your content. A well-crafted channel trailer can create excitement, build anticipation, and leave a lasting impact.
Incorporating Brand Identity into Your Trailer
Brand identity plays a crucial role in creating an effective channel trailer. It’s important to align your trailer with your overall brand image, ensuring consistency and a strong brand presence. Incorporate your brand colors, logos, and visual elements that represent your channel’s identity. This helps to establish a recognizable and cohesive brand that viewers can connect with.
When creating your channel trailer, focus on crafting engaging content that highlights your unique selling points, showcases your best work, and captures the essence of your channel. Use compelling visuals, captivating storytelling, and an authentic tone to captivate and inspire your audience.
To make your channel trailer even more impactful, consider including testimonials or snippets of positive feedback from your existing subscribers or viewers. This can help build trust and credibility, showing new viewers that your content is valued and appreciated by others.
Remember, your channel trailer should be concise and attention-grabbing. Keep it under two minutes, and ensure every second counts. Hook your viewers from the start, maintain their interest throughout, and end with a strong call to action, encouraging them to subscribe, like, and share your videos.
Crafting a Compelling Channel Description
Your channel description plays a crucial role in conveying your channel’s purpose, attracting viewers, and improving your channel’s searchability. A well-crafted channel description not only provides valuable information about your content but also entices viewers to subscribe and engage with your channel. In this section, we will guide you through the process of creating a compelling channel description that clearly communicates your channel’s purpose and captivates your audience.
Utilizing Keywords in Your Channel Description
Keywords are essential for optimizing your channel’s searchability and discoverability. When crafting your channel description, strategically incorporate relevant keywords that accurately represent your content and resonate with your target audience. This will help search engines understand the context of your channel and rank it higher in search results. However, remember to use keywords naturally and avoid keyword stuffing, as it can negatively impact the readability and user experience.
By conducting keyword research using tools like Google Keyword Planner or SEMrush, you can identify popular and relevant keywords related to your channel’s niche. Incorporate these keywords strategically throughout your channel description, including in the first few sentences and in headings and subheadings. This will not only improve your channel’s visibility but also provide a clear indication of what viewers can expect from your content.
Conveying Your Channel’s Purpose Clearly
Clear communication of your channel’s purpose is crucial to attracting and retaining viewers. When writing your channel description, clearly articulate what your channel is about, the topics you cover, and the value you provide to your audience. Use concise and engaging language to captivate readers and highlight what makes your content unique.
Consider answering questions such as:
– What value or knowledge will your channel offer?
– Who is your target audience?
– What sets your channel apart from others in your niche?
Including a brief introduction about yourself or your brand can also help establish credibility and build a connection with viewers. Ensure that your channel description is well-organized and easy to read, using bullet points or paragraphs to break down information and make it digestible.
Remember, your channel description is the first impression viewers have of your channel. By carefully crafting a compelling description that utilizes keywords and conveys your channel’s purpose clearly, you can attract the right audience, increase engagement, and ultimately grow your YouTube channel.
Gathering the Right Tools for Your YouTube Venture
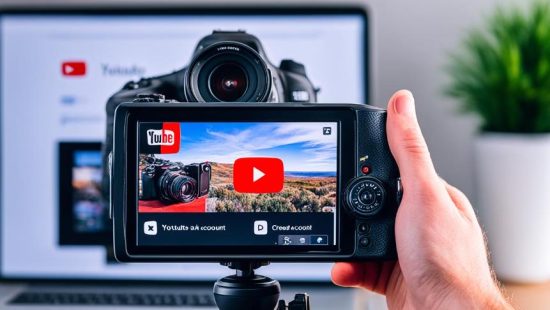
Creating professional-quality videos for your YouTube channel requires the right tools and equipment. Whether you’re just starting out or looking to upgrade your setup, having the proper gear is essential for captivating your audience and producing high-quality content.
One of the most important tools for video production is a good camera. Investing in a DSLR or mirrorless camera can significantly improve the visual quality of your videos. Popular options include the Canon EOS M50 and the Sony Alpha a6400, both known for their exceptional video capabilities.
In addition to a camera, investing in a quality microphone is crucial for clear and professional audio. A lavalier microphone, such as the Rode SmartLav+, can provide excellent sound quality while remaining discreet and easy to use. Alternatively, a shotgun microphone like the Shure VP83F can capture high-quality audio, even in noisy environments.
To enhance the overall production value of your videos, consider investing in video editing software. Adobe Premiere Pro is a popular choice among content creators, offering a wide range of editing features and professional-grade effects. If you prefer a free option, DaVinci Resolve provides powerful editing capabilities and is suitable for both beginners and advanced users.
Lastly, don’t forget about lighting. Proper lighting can dramatically improve the look of your videos. Investing in affordable LED panels or ring lights, such as the Newer LED Panel or the Diva Ring Light, can help you achieve a well-lit and professional appearance, even in lower light conditions.
By equipping yourself with the right tools and equipment, you’ll be able to create videos that stand out and engage your viewers. Remember, investing in quality gear is an investment in the success and growth of your YouTube channel.
FAQs on Starting a YouTube Channel
How to choose the right niche?
To start a YouTube channel, select a niche that aligns with your interests and expertise, ensuring it’s something you’re passionate about and that has a potential audience.
How to create engaging content?
Focus on creating high-quality, informative, and entertaining content that addresses your audience’s needs and preferences, using a consistent style and format.
How to optimize videos for search?
Use relevant keywords in your video titles, descriptions, and tags to improve searchability, and create compelling thumbnails to attract more viewers to your channel.
How to grow your subscriber base?
Promote your channel through social media, engage with your audience through comments and community posts, and collaborate with other YouTubers to reach a wider audience.